


Innovazione Locale
Innovazione Locale
Innovazione Locale: laboratori, idee, progetti e applicazioni pratiche
[link] blog di riferimento
Arduino
Arduino
What is Arduino?
Arduino is an open-source prototyping platform based on easy-to-use hardware and software. Arduino boards are able to read inputs - light on a sensor, a finger on a button, or a Twitter message - and turn it into an output - activating a motor, turning on an LED, publishing something online. You can tell your board what to do by sending a set of instructions to the microcontroller on the board. To do so you use the Arduino programming language (based on Wiring), and the Arduino Software (IDE), based on Processing.
Over the years Arduino has been the brain of thousands of projects, from everyday objects to complex scientific instruments. A worldwide community of makers - students, hobbyists, artists, programmers, and professionals - has gathered around this open-source platform, their contributions have added up to an incredible amount of accessible knowledge that can be of great help to novices and experts alike.
Arduino was born at the Ivrea Interaction Design Institute as an easy tool for fast prototyping, aimed at students without a background in electronics and programming. As soon as it reached a wider community, the Arduino board started changing to adapt to new needs and challenges, differentiating its offer from simple 8-bit boards to products for IoT applications, wearable, 3D printing, and embedded environments. All Arduino boards are completely open-source, empowering users to build them independently and eventually adapt them to their particular needs. The software, too, is open-source, and it is growing through the contributions of users worldwide.
Why Arduino?
Thanks to its simple and accessible user experience, Arduino has been used in thousands of different projects and applications. The Arduino software is easy-to-use for beginners, yet flexible enough for advanced users. It runs on Mac, Windows, and Linux. Teachers and students use it to build low cost scientific instruments, to prove chemistry and physics principles, or to get started with programming and robotics. Designers and architects build interactive prototypes, musicians and artists use it for installations and to experiment with new musical instruments. Makers, of course, use it to build many of the projects exhibited at the Maker Faire, for example. Arduino is a key tool to learn new things. Anyone - children, hobbyists, artists, programmers - can start tinkering just following the step by step instructions of a kit, or sharing ideas online with other members of the Arduino community.
There are many other microcontrollers and microcontroller platforms available for physical computing. Parallax Basic Stamp, Netmedia's BX-24, Phidgets, MIT's Handyboard, and many others offer similar functionality. All of these tools take the messy details of microcontroller programming and wrap it up in an easy-to-use package. Arduino also simplifies the process of working with microcontrollers, but it offers some advantage for teachers, students, and interested amateurs over other systems:
- Inexpensive - Arduino boards are relatively inexpensive compared to other microcontroller platforms. The least expensive version of the Arduino module can be assembled by hand, and even the pre-assembled Arduino modules cost less than $50
- Cross-platform - The Arduino Software (IDE) runs on Windows, Macintosh OSX, and Linux operating systems. Most microcontroller systems are limited to Windows.
Simple, clear programming environment - The Arduino Software (IDE) is easy-to-use for beginners, yet flexible enough for advanced users to take advantage of as well. For teachers, it's conveniently based on the Processing programming environment, so students learning to program in that environment will be familiar with how the Arduino IDE works.
- Open source and extensible software - The Arduino software is published as open source tools, available for extension by experienced programmers. The language can be expanded through C++ libraries, and people wanting to understand the technical details can make the leap from Arduino to the AVR C programming language on which it's based. Similarly, you can add AVR-C code directly into your Arduino programs if you want to.
- Open source and extensible hardware - The plans of the Arduino boards are published under a Creative Commons license, so experienced circuit designers can make their own version of the module, extending it and improving it. Even relatively inexperienced users can build the breadboard version of the module in order to understand how it works and save money.
Approfondimenti
Writing Example Code
Efficiency is not paramount; readability is.
The most important users of Arduino are beginners and people who don't care about code, but about getting projects done.
Think generously about people who know less than you about code. Don't think they should understand some technical concept. They don't, and they're not stupid for not understanding. Your code should explain itself, or use comments to do the same. If it needs a complex concept like registers or interrupts or pointers, either explain it or skip it.
When forced to choose between technically simple and technically efficient, choose the former.
Introduce concepts only when they are useful and try to minimize the number of new concepts you introduce in each example. For example, at the very beginning, you can explain simple functions with no variable types other than int, nor for consts to define pin numbers. On the other hand, in an intermediate example, you might want to introduce peripheral concepts as they become useful. Concepts like using const ints to define pin numbers, choosing bytes over ints when you don't need more than 0 - 255, etc. are useful, but not central to getting started. So use them sparingly, and explain them when they're new to your lesson plan.
Put your setup() and your loop() at the beginning of the program. They help beginners to get an overview of the program, since all other functions are called from those two.
Commenting Your Code
Comment every variable or constant declaration with a description of what the variable does.
Comment every code block. Do it before the block if possible, so the reader knows what's coming
Comment every for loop
Use verbose if statements. For simplicity to the beginning reader, use the block format for everything, i.e. avoid this:
if (somethingIsTrue) doSomething;
Instead, use this:
if (somethingIsTrue == TRUE) {
doSomething;
}
Avoid pointers
Avoid #defines
Variables
Avoid single letter variable names. Make them descriptive
Avoid variable names like val or pin. Be more descriptive, like buttonState or switchPin
If you want to define pin names and other quantities which won't change, use const ints. They're less messy than #defines, yet still give you a way to teach the difference between a variable and a constant.
Use the wiring/Processing-style variable types, e.g. boolean,char,byte,int,unsigned int,long,unsigned long,float,double,string,array,void when possible, rather than uint8_t, etc. The former are explained in the documentation, and less terse names.
Avoid numbering schemes that confuse the user, e.g.:
pin1 = 2
pin2 = 3
etc.
If you need to renumber pins, consider using an array, like this:
int myPins[] = { 2, 7, 6, 5, 4, 3 };
This allows you to refer to the new pin numbers using the array elements, like this:
digitalWrite(myPins[1], HIGH); // turns on pin 7
It also allows you to turn all the pins on or off in the sequence you want, like this:
for (int thisPin = 0; thisPin < 6; thisPin++) {
digitalWrite(myPins[thisPin], HIGH);
delay(500);
digitalWrite(myPins[thisPin], LOW);
delay(500);
}
Explain the code at the start
Here's a good title block:
/*
Sketch title
Describe what it does in layman's terms. Refer to the components
attached to the various pins.
The circuit:
* list the components attached to each input
* list the components attached to each output
Created day month year
By author's name
Modified day month year
By author's name
http://url/of/online/tutorial.cc
*/
Circuits
For digital input switches, the default is to use a pulldown resistor on the switch rather than a pullup. That way, the logic of a switch's interaction makes sense to the non-engineer.
Keep your circuits simple. For example, bypass capacitors are handy, but most simple inputs will work without them. If a component is incidental, explain it later.Droni
Droni
 Durante la pausa estiva sarà acquistato tutto il materiale per la realizzazione di alcuni modelli di drone, che poi verranno impiegati durante il quarto – e conclusivo – laboratorio dedicato ai rilievi geo ambientali: rilievi e analisi del nostro territorio finalizzati alla conoscenza e comprensione delle varie criticità.
È importante sottolineare l’altissimo valore di questo laboratorio vista la partecipazione del prof. C.A. Garzonio (Unifi) geologo internazionale e di operatori esperti di aereo-modelli.
Per maggiori informazioni e/o iscrizioni:
WhatsApp 3703315638
NUOVA NORMATIVA ENAC [DOCUMENTAZIONE]
Maker
Maker
“MAKER” IL MOVIMENTO CHE HA ISPIRATO LA NOSTRA INIZIATIVA
di Carlo Giulietti
Il progetto si propone lo scopo principale di innescare processi di partecipazione relativi alle tematiche ambientali tramite l’impiego di strumenti tecnologicamente avanzati (alcuni di quelli impiegati dai Makers), strumenti che fino a pochi anni fa sarebbero stati riservati ad una elite di ricercatori e oggi invece sono alla portata di molti.
Le frasi seguenti, tratte dal web, soprattutto da “Maker Faire Roma”, sintetizzano bene i concetti che hanno ispirato il Laboratorio Ambiente:
Nel corso degli ultimi anni abbiamo assistito a un importante ritorno di attenzione sul mondo della manifattura come spazio di sperimentazione e di innovazione. Il fenomeno dei Maker negli Stati Uniti e le sue importanti ricadute in Europa suggeriscono di guardare con attenzione all’energia e all’entusiasmo generati da questa mescola originale fra tecnologie e mondo reale.
In particolare, è auspicabile che il fenomeno dei Maker trovi riscontro nel mondo della scuola... il futuro lo costruiranno soprattutto loro...
Chi sono i Makers?
Potrebbero essere definiti gli hobbisti tecnologici del 21esimo secolo. Si interessano di tecnologia, design, arte, sostenibilità, modelli di business alternativi. Vivono di comunità online, software e hardware open source, ma anche del sogno di inventare qualcosa da produrre autonomamente, per vivere delle proprie invenzioni.
In una fase di crisi si affidano alla creatività facendo della propria passione un lavoro.
Il movimento dei Makersi basa sulla riutilizzazione e condivisione dei risultati,sulla creatività e sull’innovazione. Sul medio e lungo periodo potrebbe permettere di innescare importanti effetti virtuosi sull’economia, in cui comunità crescenti di makers sperimentano nuovi approcci alla produzione basati su tecnologie a basso costo.
Il primo a intuire che questa dei "maker" sarà la nuova rivoluzione industriale è stato il direttore del magazine Wired,Chris Anderson, che nel 2010 intitolò un suo saggio, "Gli atomi sono i nuovi bits": prendeva spunto dal nome di un laboratorio aperto al Mit di Boston qualche anno prima da Neil Gershenfeld,"Center for bits and atoms", luogo dove si poteva produrre quasi qualsiasi cosa
“Una generazione di “makers” che usano i modelli innovativi del Web aiuterà la prossima grande ondata di cambiamento nell’economia globale perché le nuove tecnologie del digitaldesign e della prototipazione stanno dando a tutti il potere d’inventare e creare “la coda lunga delle cose”
[Chris Anderson]
Concludo con una frase pronunciata da Obama dopo aver visto all’opera un giovanissimo Maker: "Do not be bored, do something", smettetela di annoiarvi, fate qualcosa. Anzi, costruitela questa cosa, oggi si può.
Laboratorio "Arduino base"
Laboratorio "Arduino base"
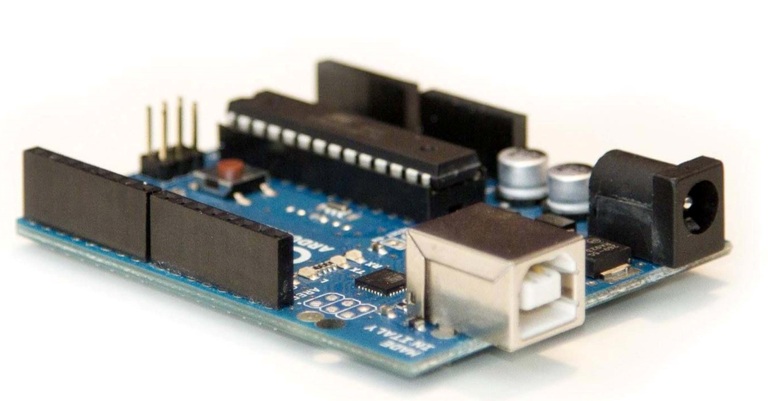
Arduino è una scheda elettronica di dimensioni ridotte con un microcontrollore e circuiteria di contorno. E' un strumento potente e versatile con cui si possono creare rapidamente prototipi. Tutto il software a corredo è OpenSource, e gli schemi circuitali sono distribuiti come hardware libero.
Versione utilizzata: Arduino Uno